Field Guide to Arctic and Antarctic Expedition Photography
In the Arctic, the horizon is broken by pack ice and low islands; in Antarctica, it rises in walls of glacial blue. Both demand precision in light and exposure, and both punish complacency with cold, motion, and distance. This field guide treats them in parallel: the techniques transfer, but the wildlife, light, and logistics do not. For those considering expert-led polar photography expeditions, the distinctions matter as much as the overlap.
The Universal Polar Rules
- Expose to the right, but protect highlights: +0.7 to +1.3 EV in snow, then check the histogram.
- Keep batteries warm and rotated; expect half their rated life in sub-zero air.
- From a Zodiac, treat 1/1000 sec as a floor for wildlife; double it for birds in flight.
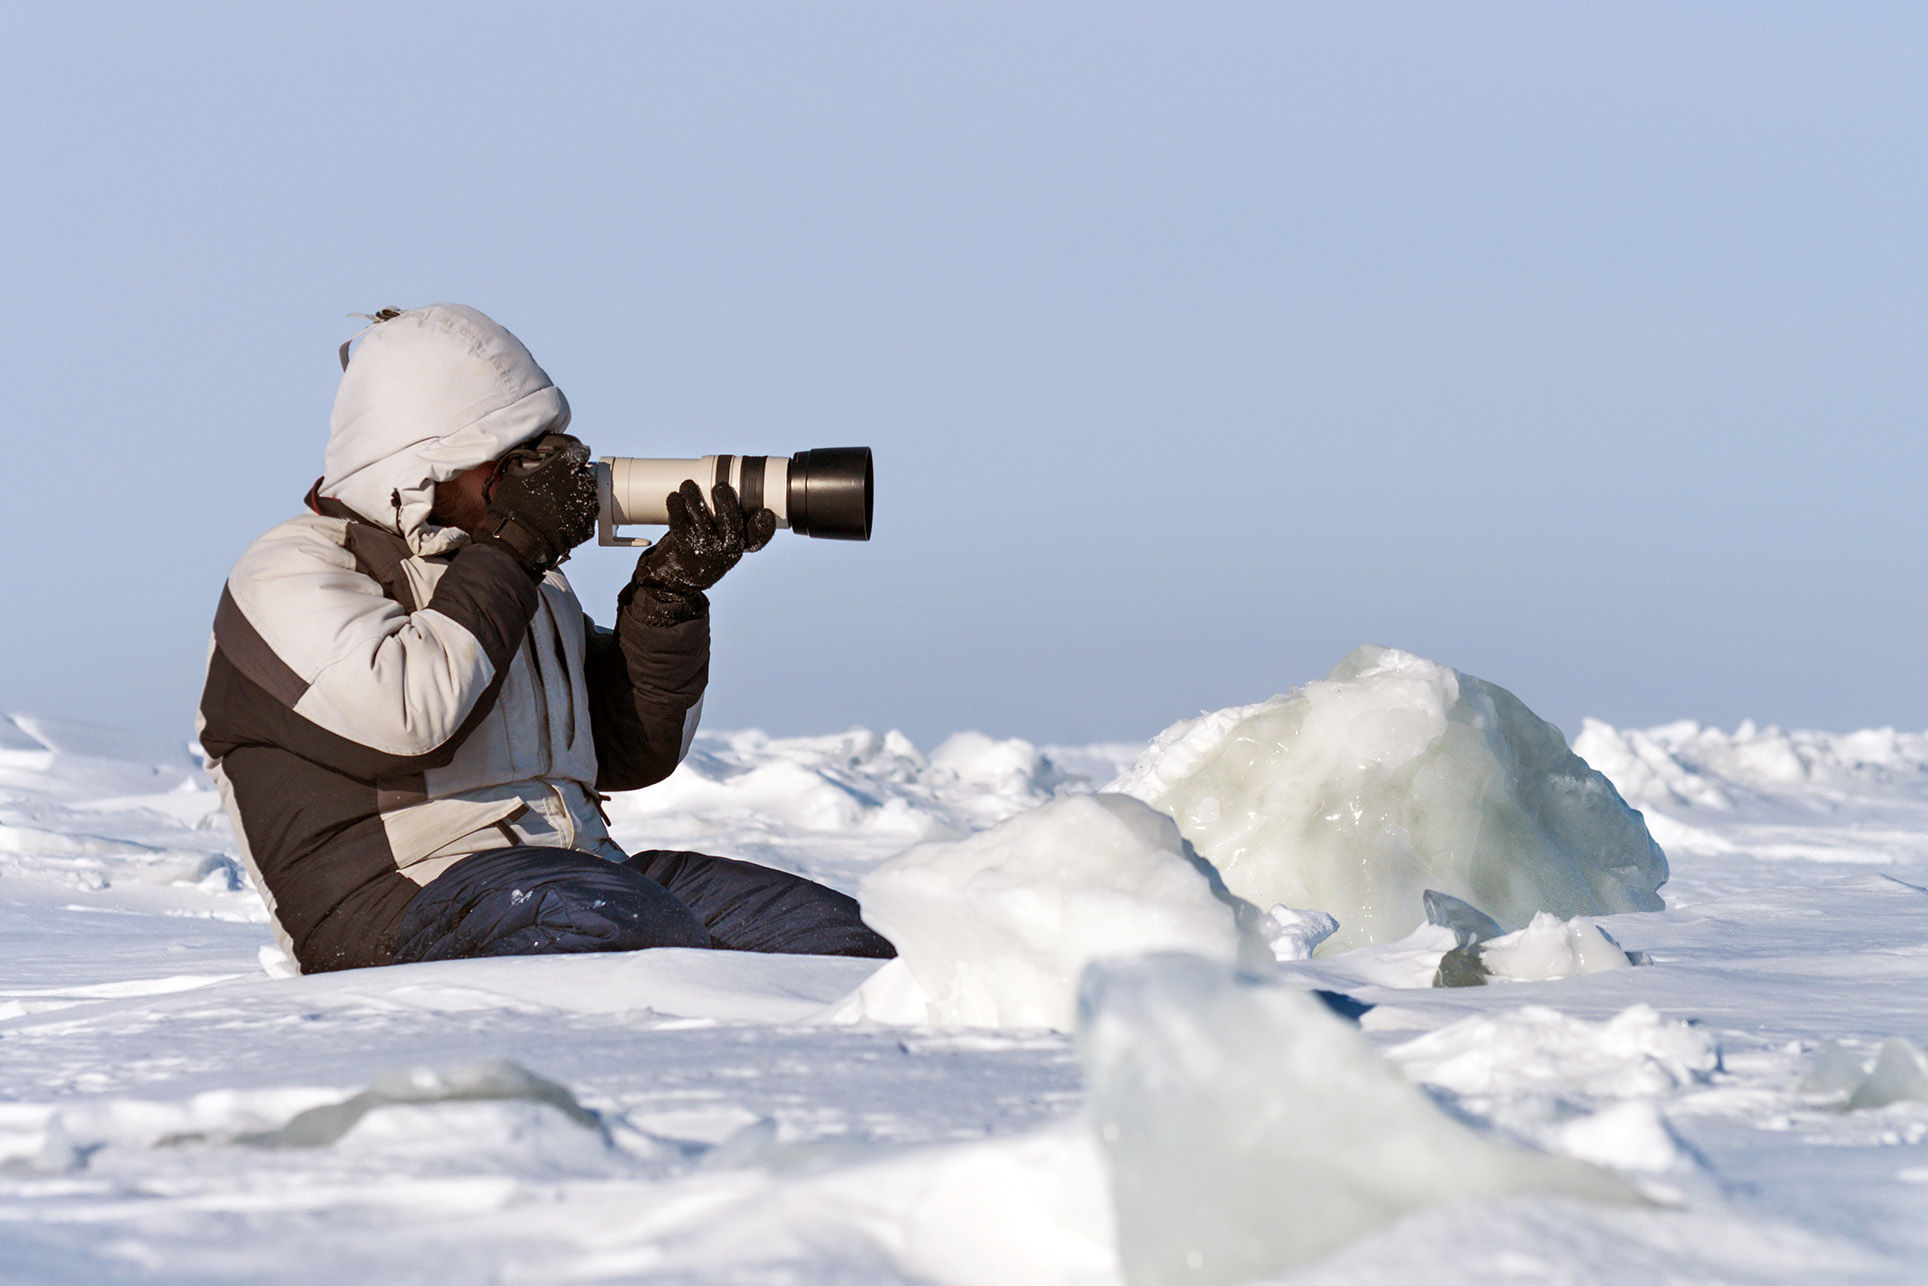
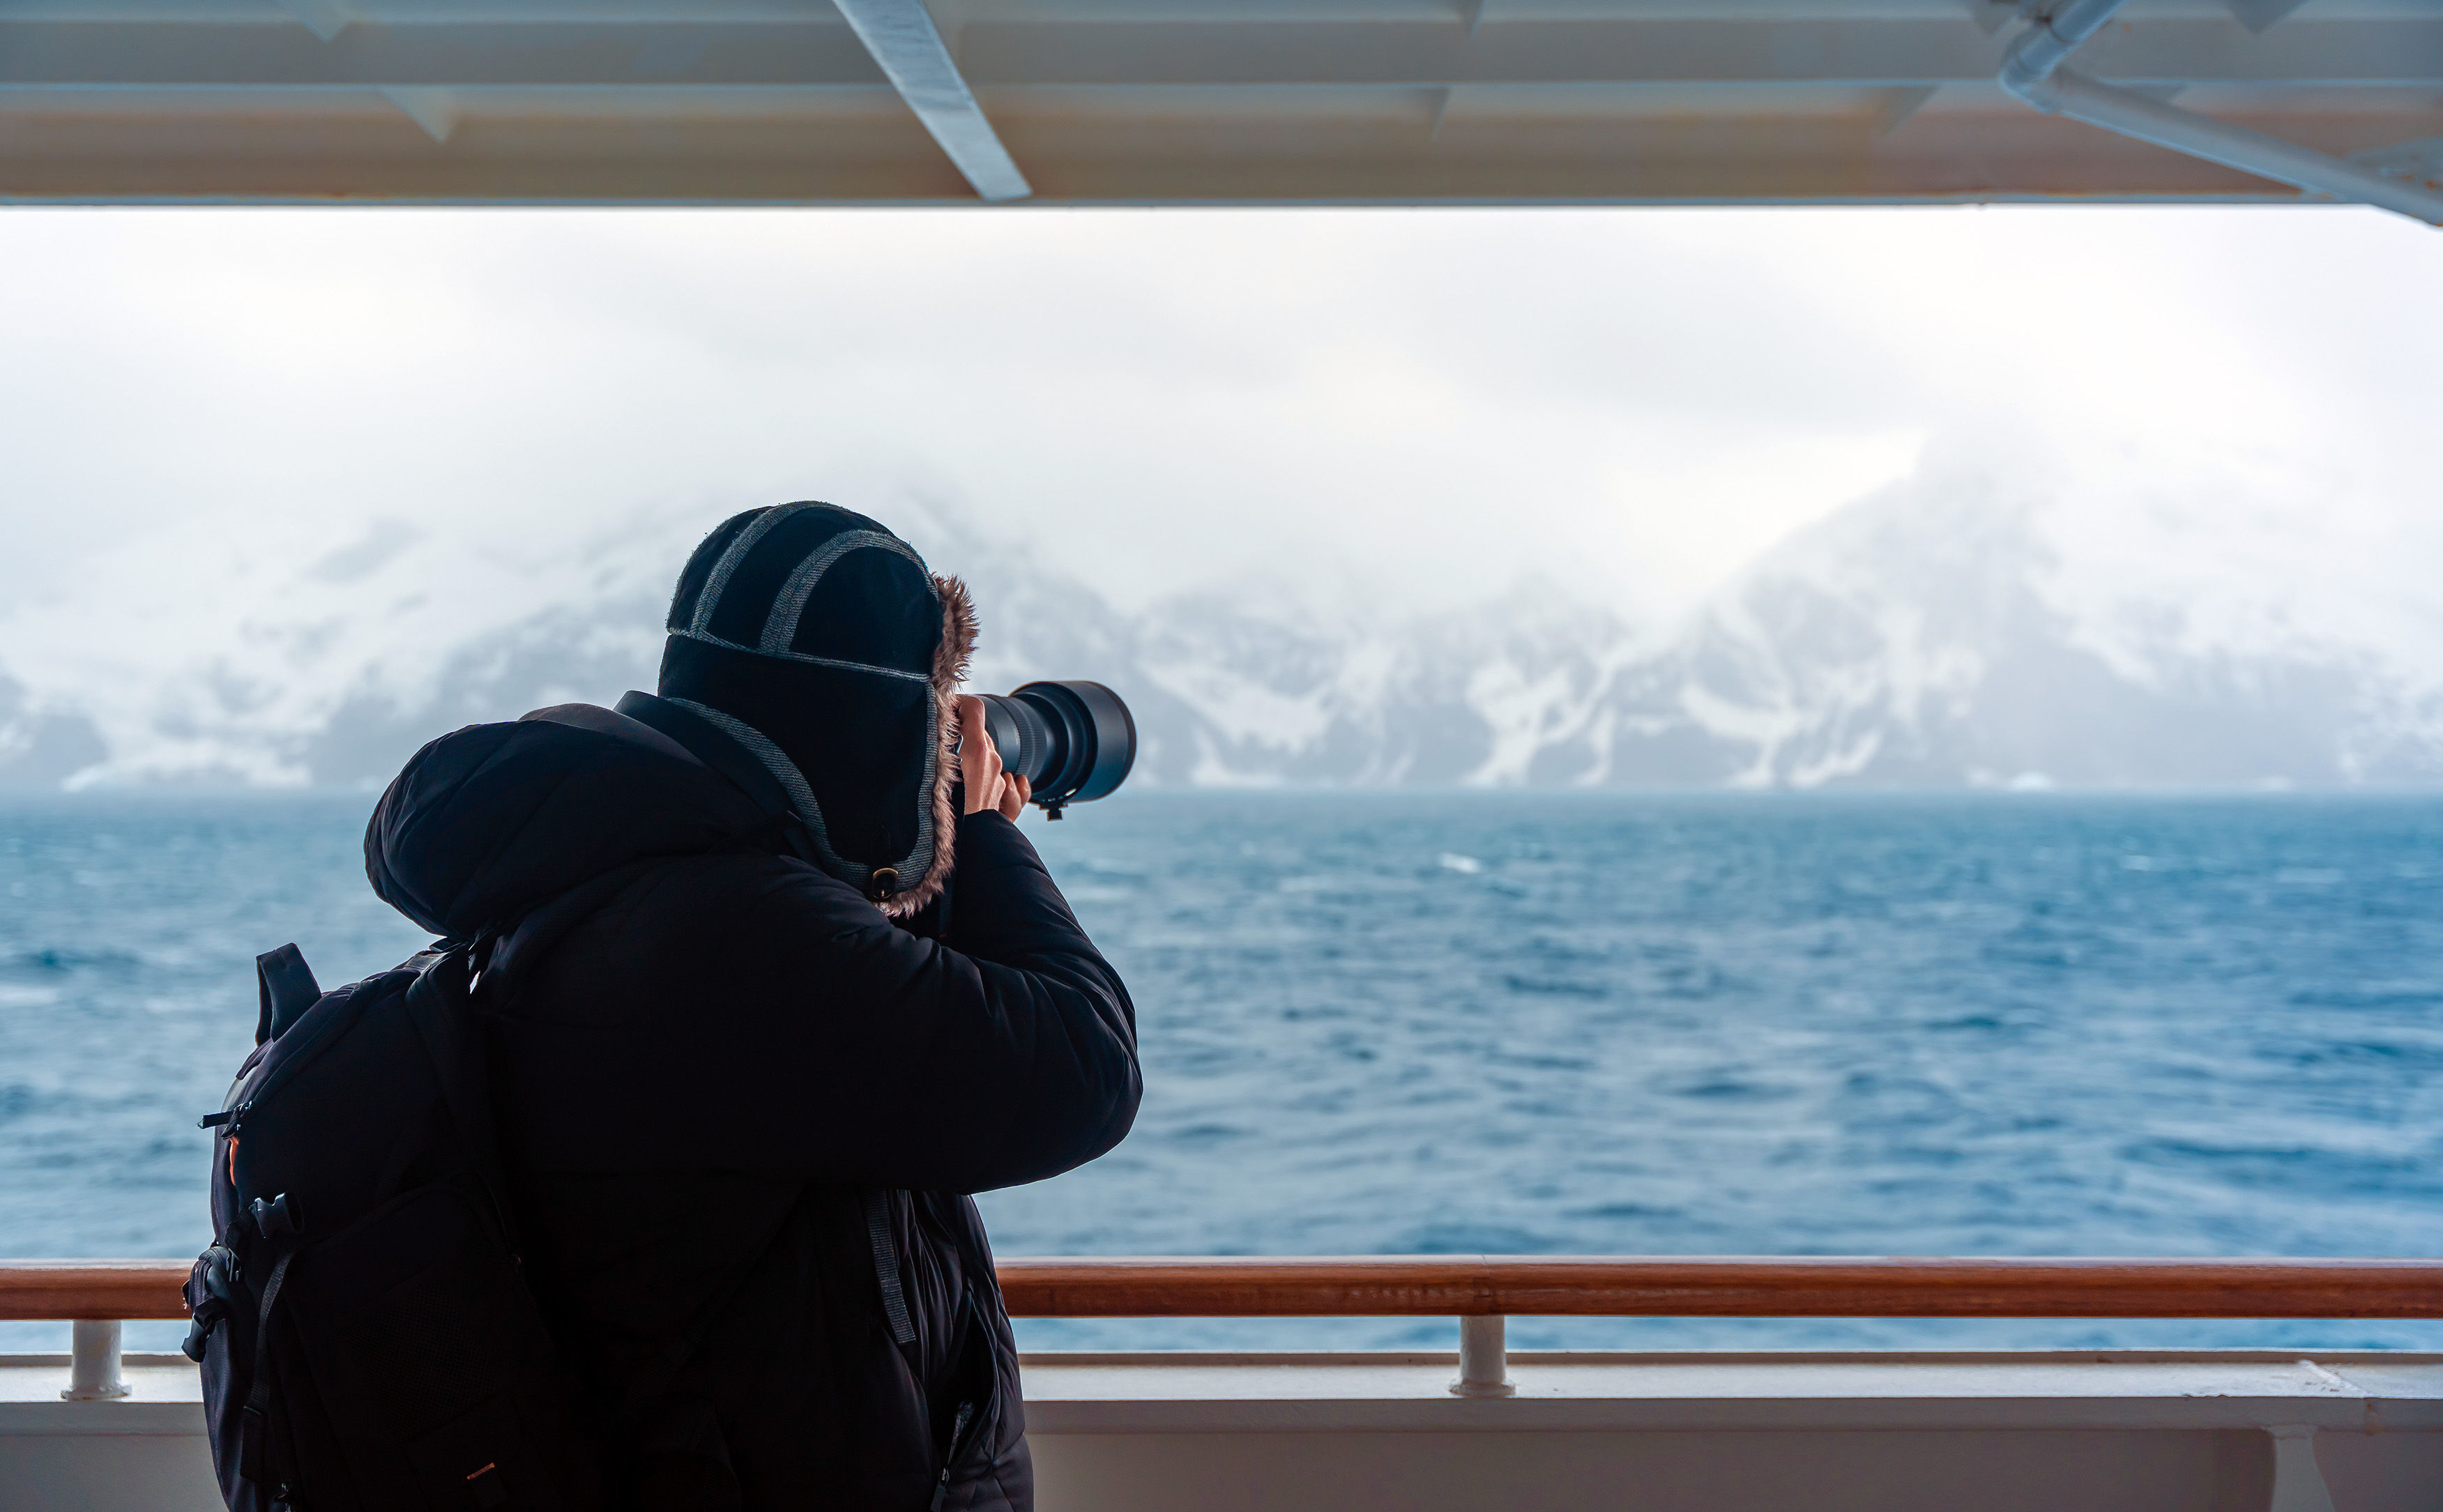
- Use two bodies: one long (100–400mm or 200–600mm), one mid (24–70mm); avoid lens changes in spray.
- Warm the camera in a sealed bag before bringing it inside to prevent condensation.
The Poles Share: Cold, Light, and Motion
Snow and ice trick evaluative metering into underexposure. The camera reads a white field as middle gray, so files come out dull and blue. Dial in positive exposure compensation—often around +1 EV—and confirm with the histogram, not the rear screen. In overcast light, the tonal range compresses; subtle gradients matter more than contrast, and white balance can drift. Shooting RAW preserves the latitude to correct.
Cold alters behavior. Lithium-ion batteries lose efficiency; a body that yields 800 frames at room temperature may deliver 300 on deck. Keep spares in an inner pocket and rotate them. Condensation is the quieter risk: a cold camera brought into a heated cabin will fog internally. Seal it in a dry bag or zip-top before coming inside and let it warm gradually. The rule is simple: let the air change, not the moisture.
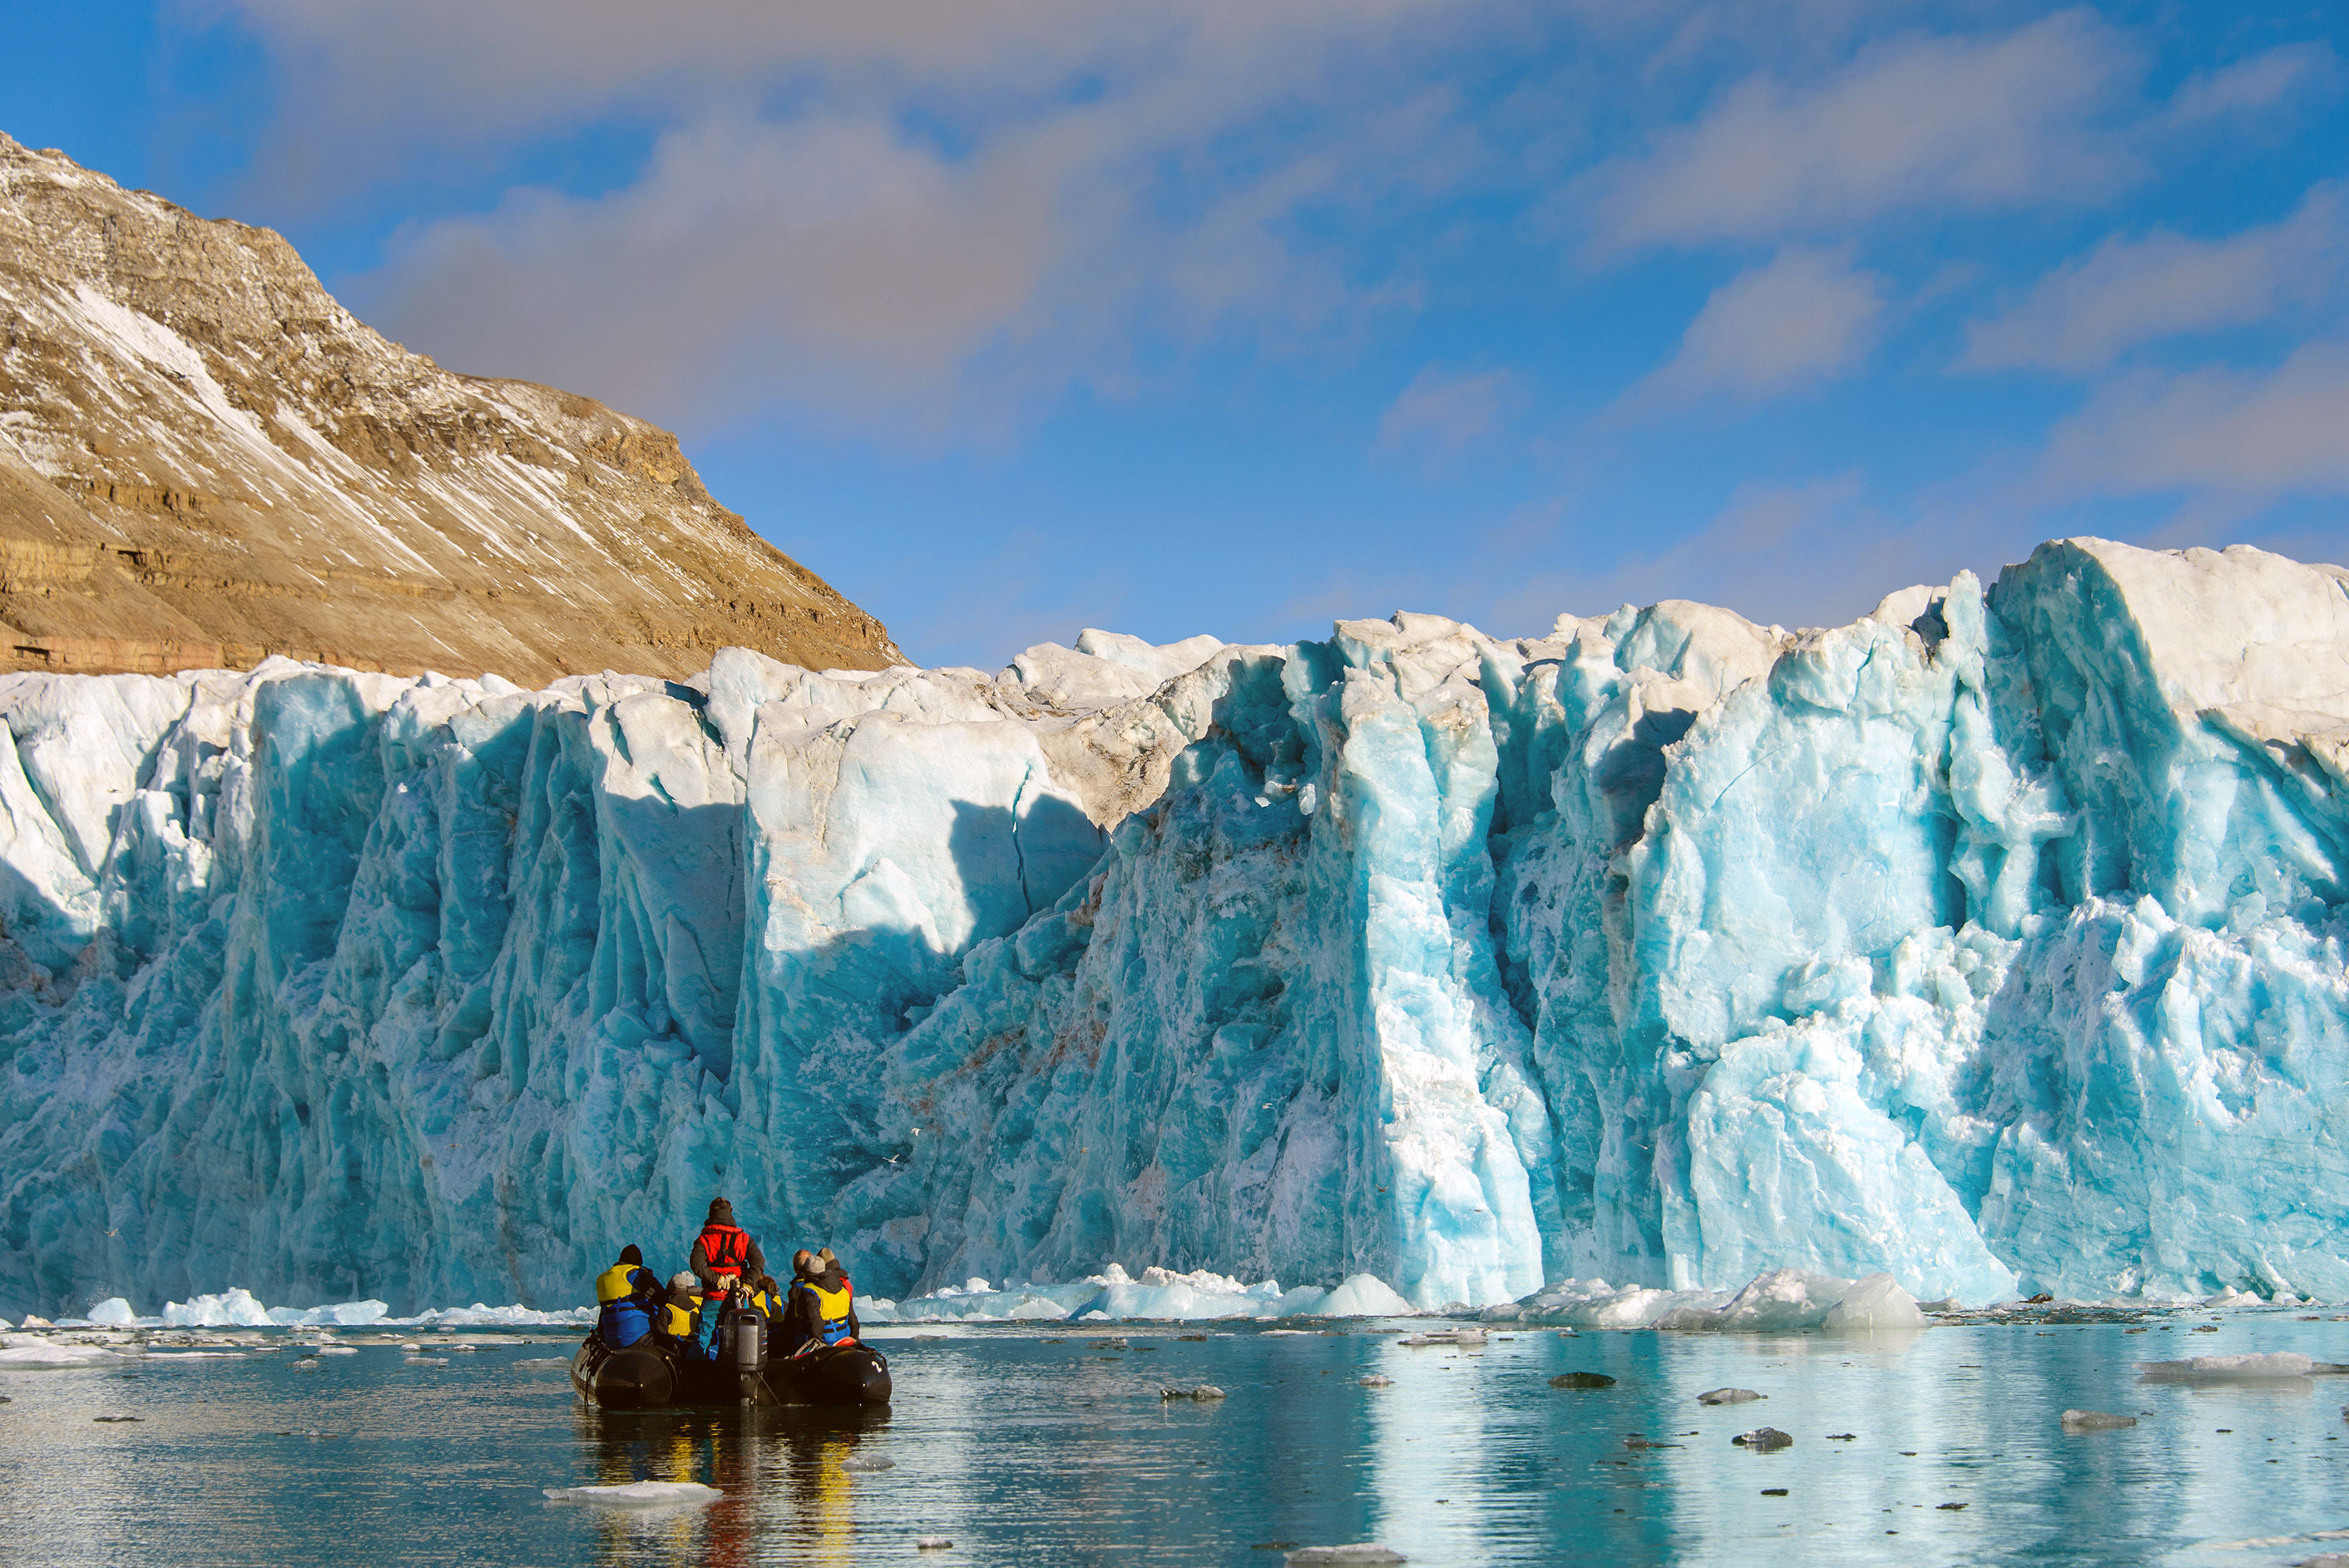
Most shooting happens from a moving platform. Zodiacs idle, surge, and pivot with swell and wind. Image stabilization helps, but shutter speed matters more. For mammals at rest, 1/1000 sec is a practical floor; for seabirds, 1/2000 sec avoids wing blur. Autofocus benefits from a single, flexible point or a small zone rather than full-area modes that can grab high-contrast ice.
A two-body kit is not indulgence but efficiency. One body carries a long zoom for wildlife; the other, a mid-range for context and ice. Lens changes invite salt spray and missed moments. Keep both ready, both capped, both tethered.
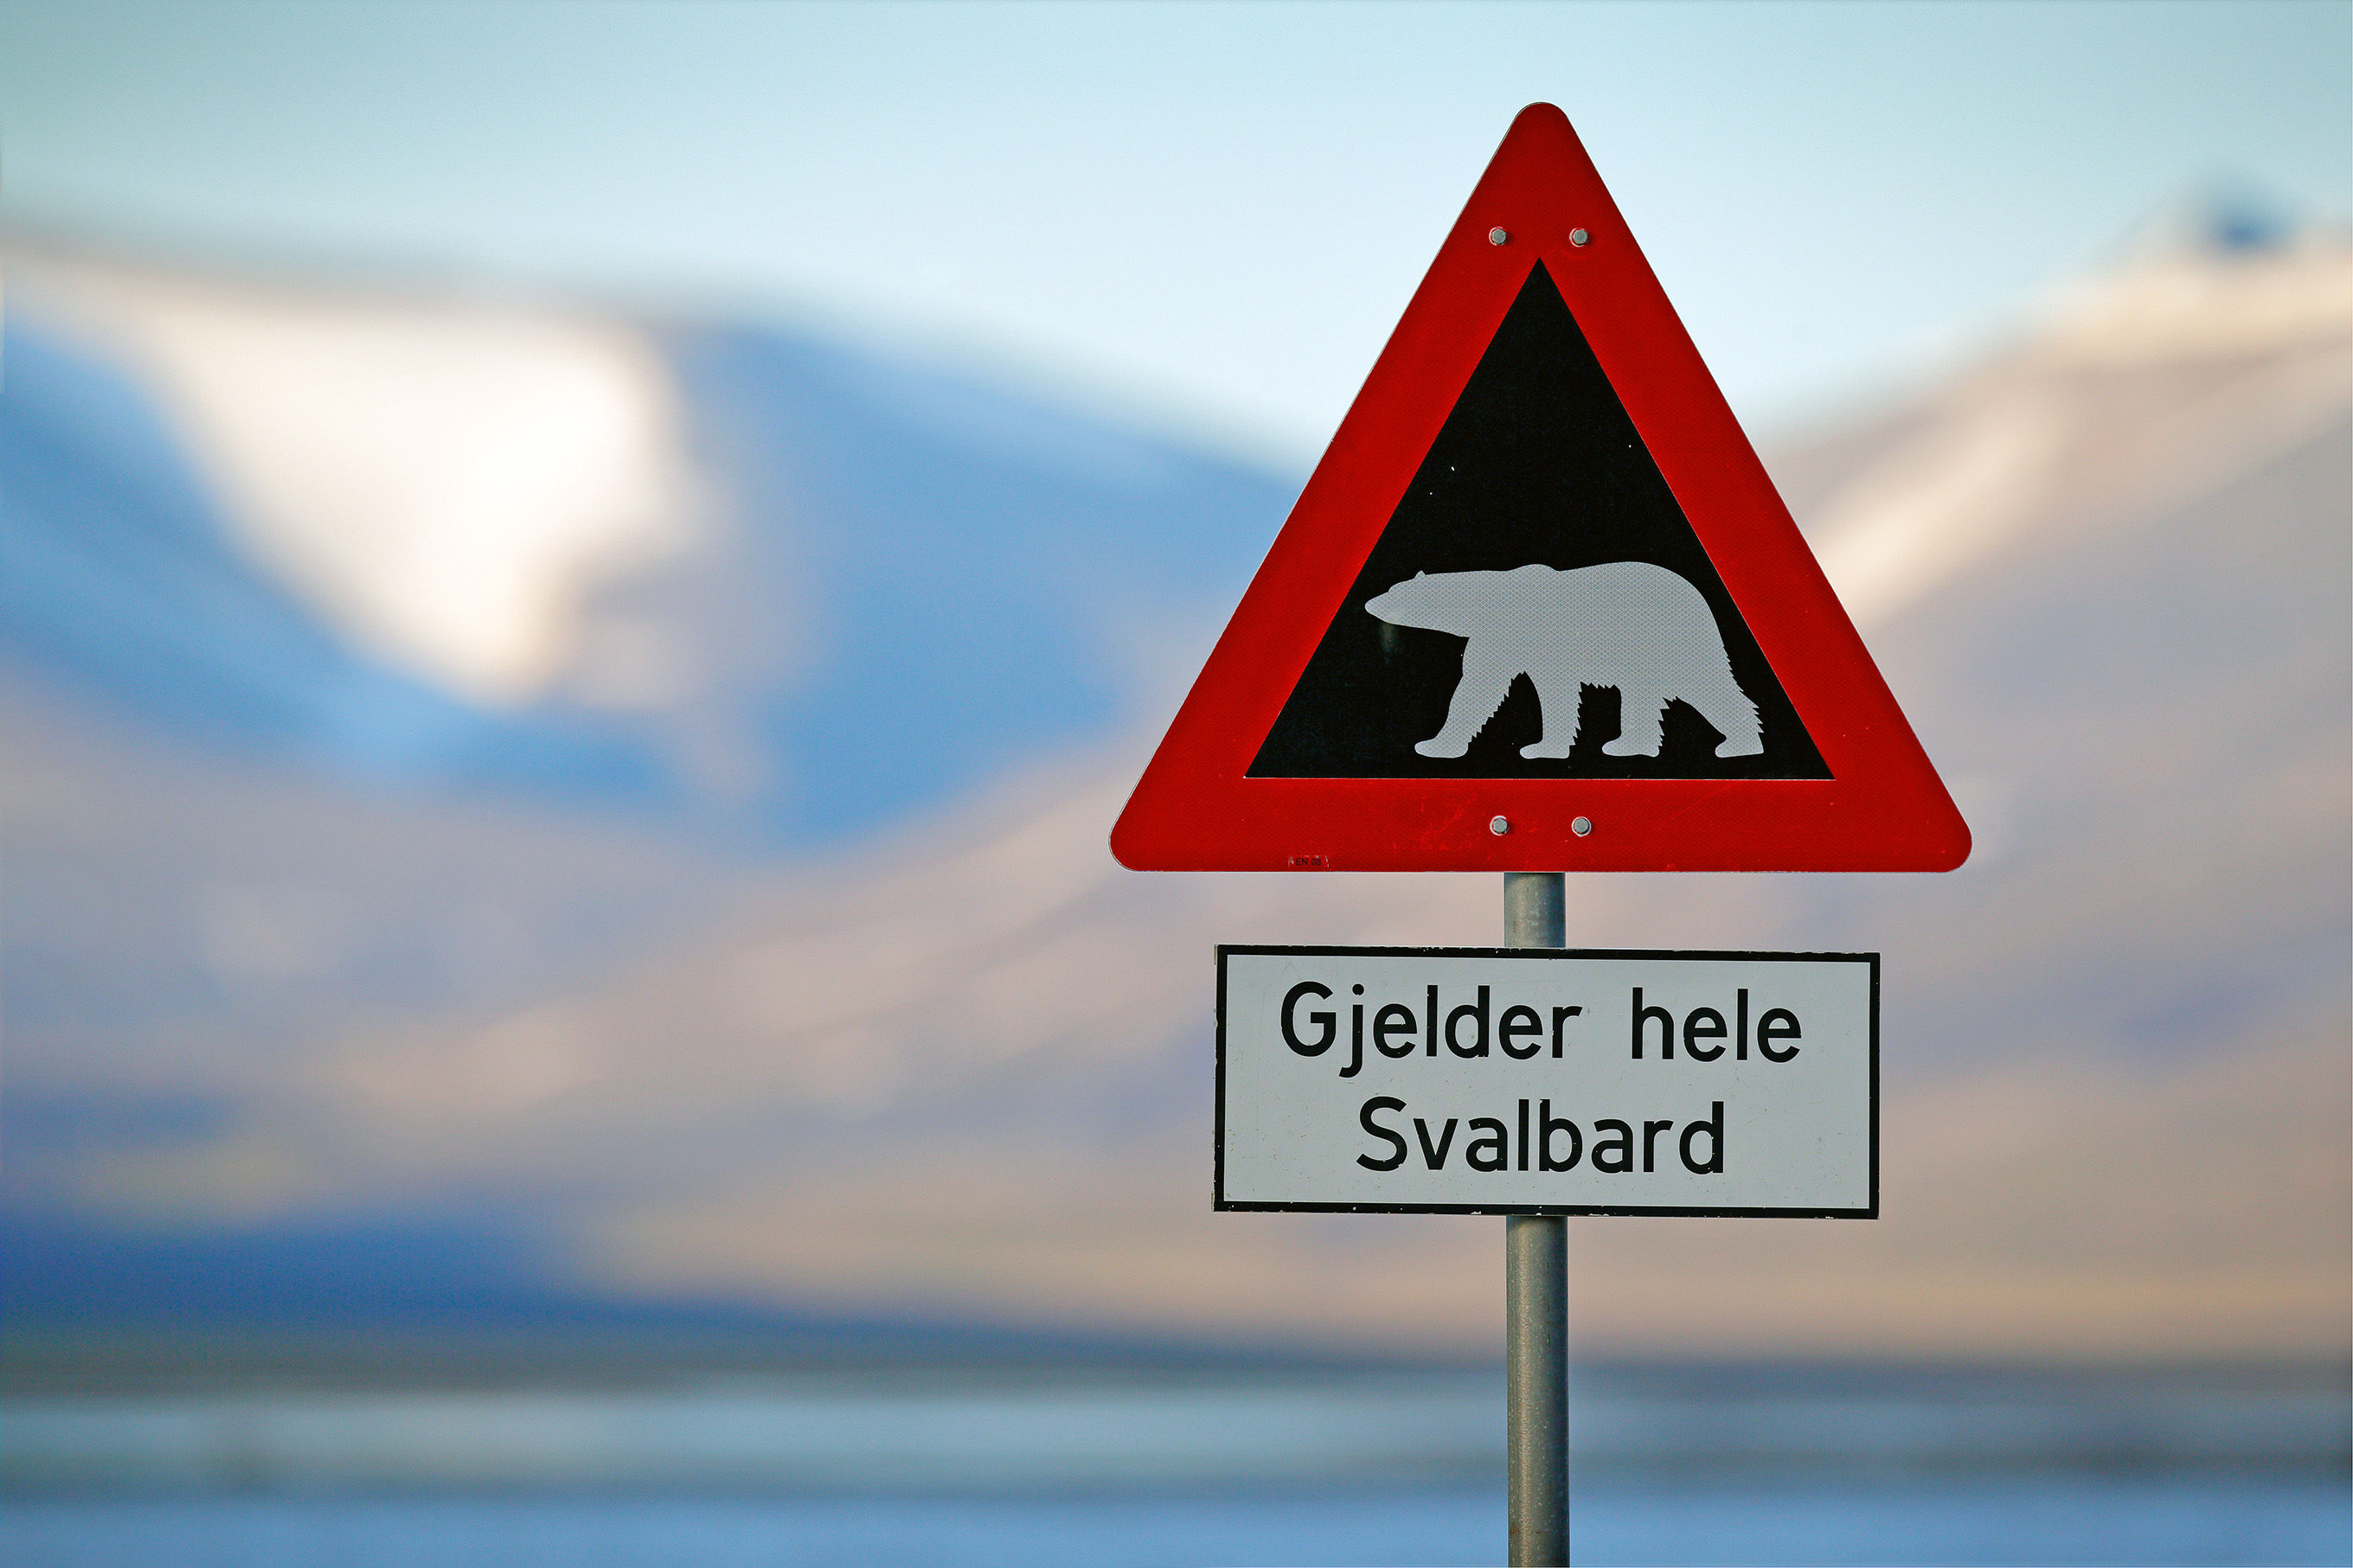
Arctic Photography: Polar Bears, Pack Ice, Midnight Sun

Polar bear photography is defined as much by distance as by light. Responsible operators maintain a wide buffer—often 100 meters or more—both for safety and to avoid altering behavior. At that range, 400–600mm lenses are not optional. Even then, the frame is often about gesture rather than proximity: a bear scenting the wind, a slow traverse across pressure ridges, the moment it steps from one floe to the next. Watch for cues—head raised, nose working, a change in gait—that precede action. Pre-focus, raise shutter speed, and wait.
Svalbard anchors most Svalbard photography tours because it sits at the confluence of open water and pack ice around 78°N. The pack-ice edge shifts daily, drawing seals and, in turn, bears. Along the coast, walrus haul out on low beaches, their mass and proximity suited to 100–400mm. At Alkefjellet, black-and-white kittiwakes nest by the tens of thousands on basalt columns; here, the problem is not reach but chaos—tracking birds against dark rock demands disciplined autofocus and high shutter speeds.
Light in the High Arctic is less about golden hour than about duration. The midnight sun flattens shadows at noon and then, for hours, skims the horizon in a prolonged blue hour. The color temperature cools, contrast softens, and ice takes on a diffuse luminosity that rewards restraint. Work silhouettes against the low sun, then pivot to details as the light wraps around.
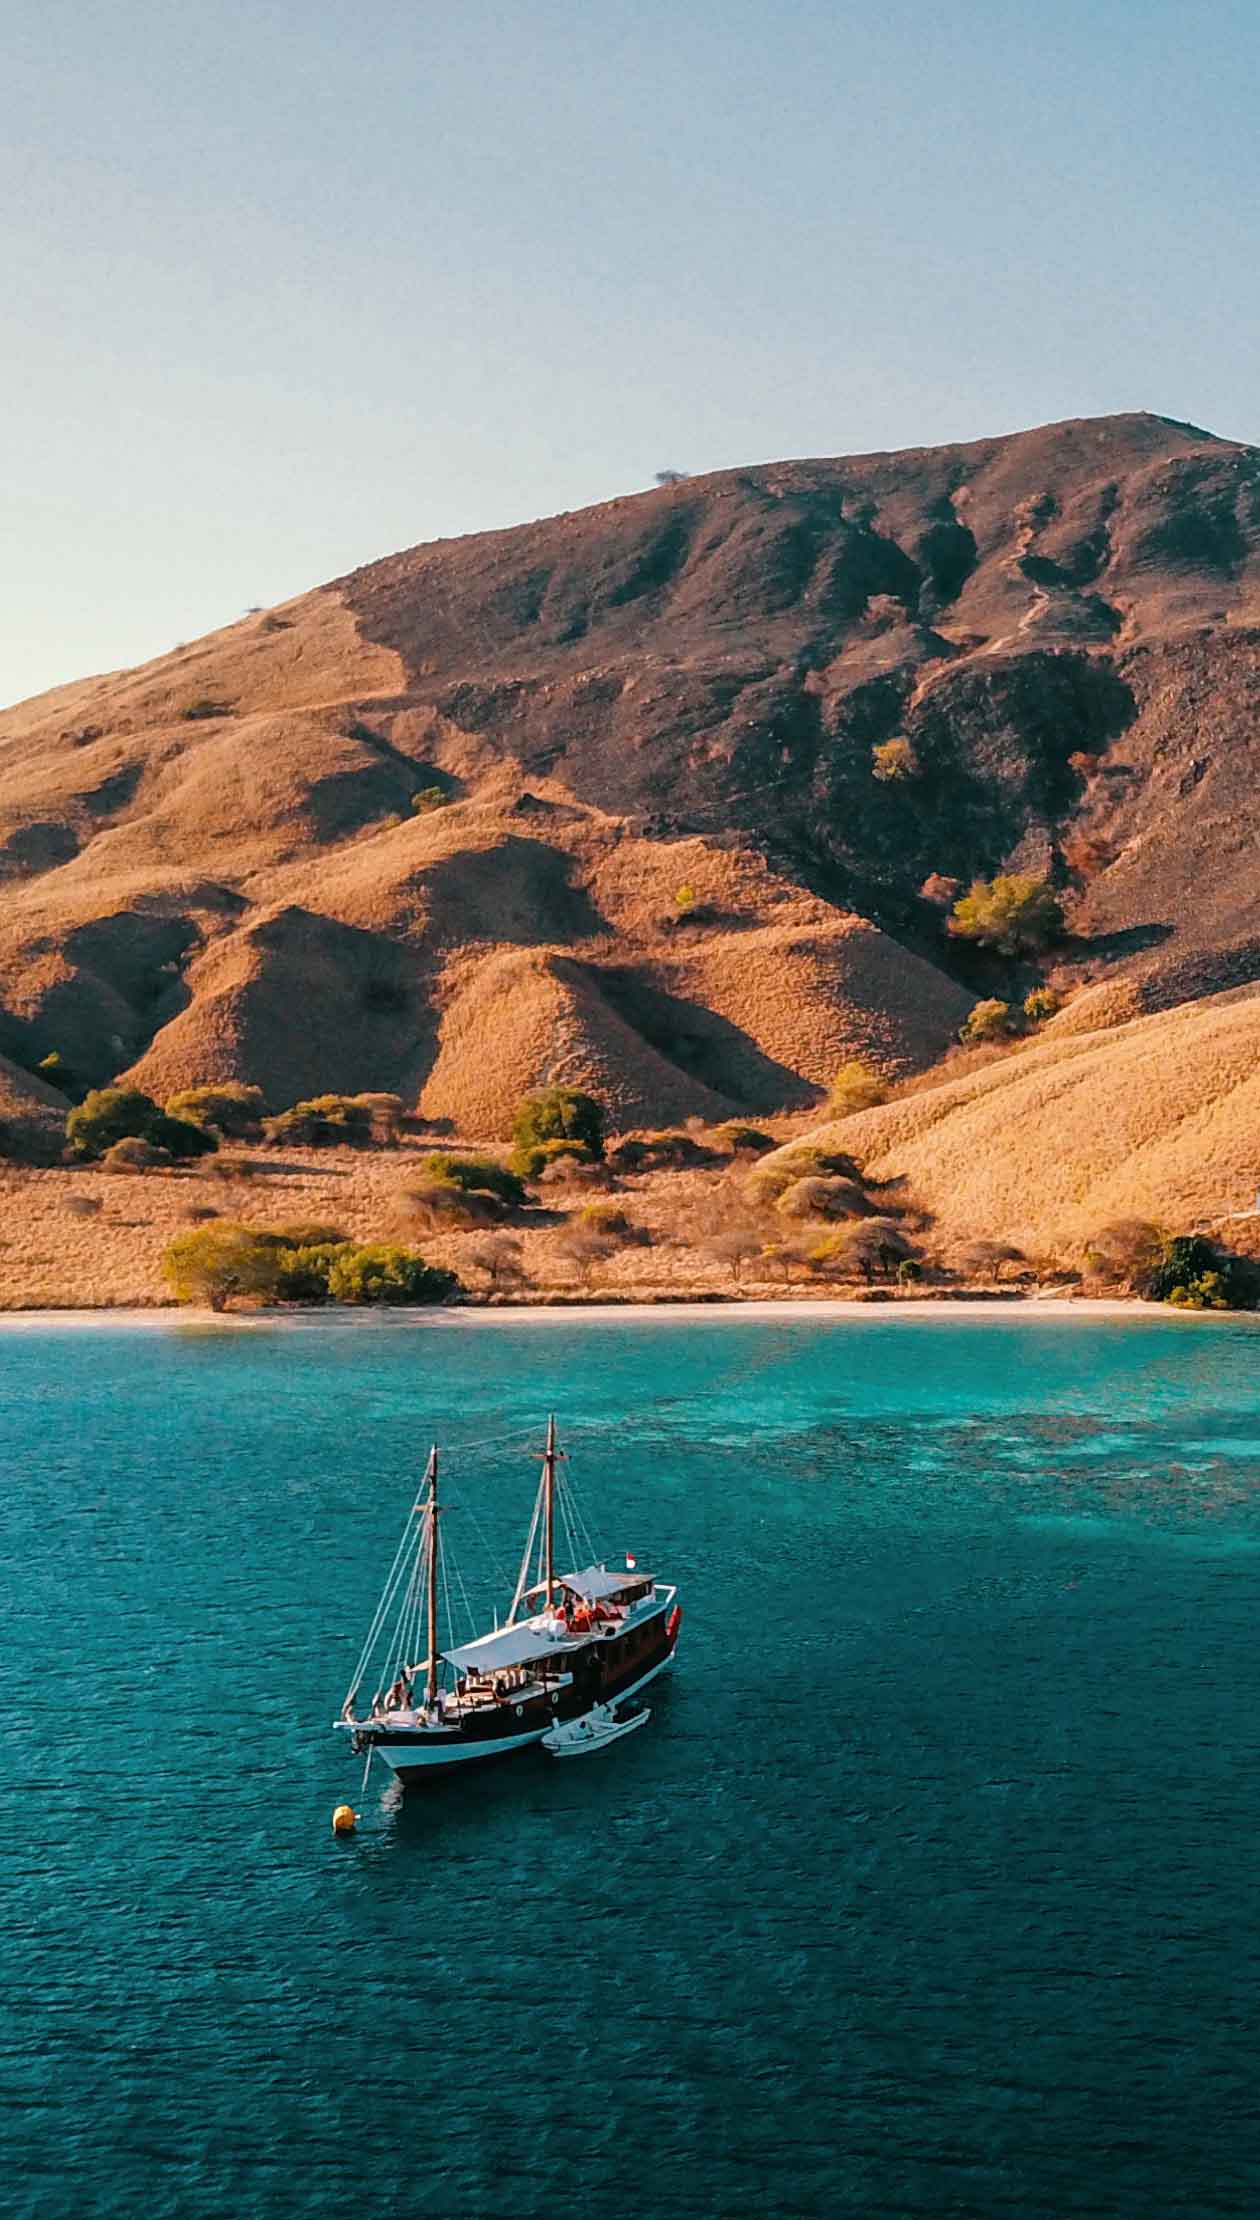
Beyond Svalbard, Greenland’s Scoresby Sund offers scale—icebergs calved from inland glaciers drift through a maze of fjords, with occasional musk ox on shore—and Franz Josef Land adds remoteness and ice. Each is a variation on the same discipline: distance, patience, and an acceptance that the frame is often defined by what does not happen.
Antarctic Photography: Penguins, Tabular Bergs, the Drake
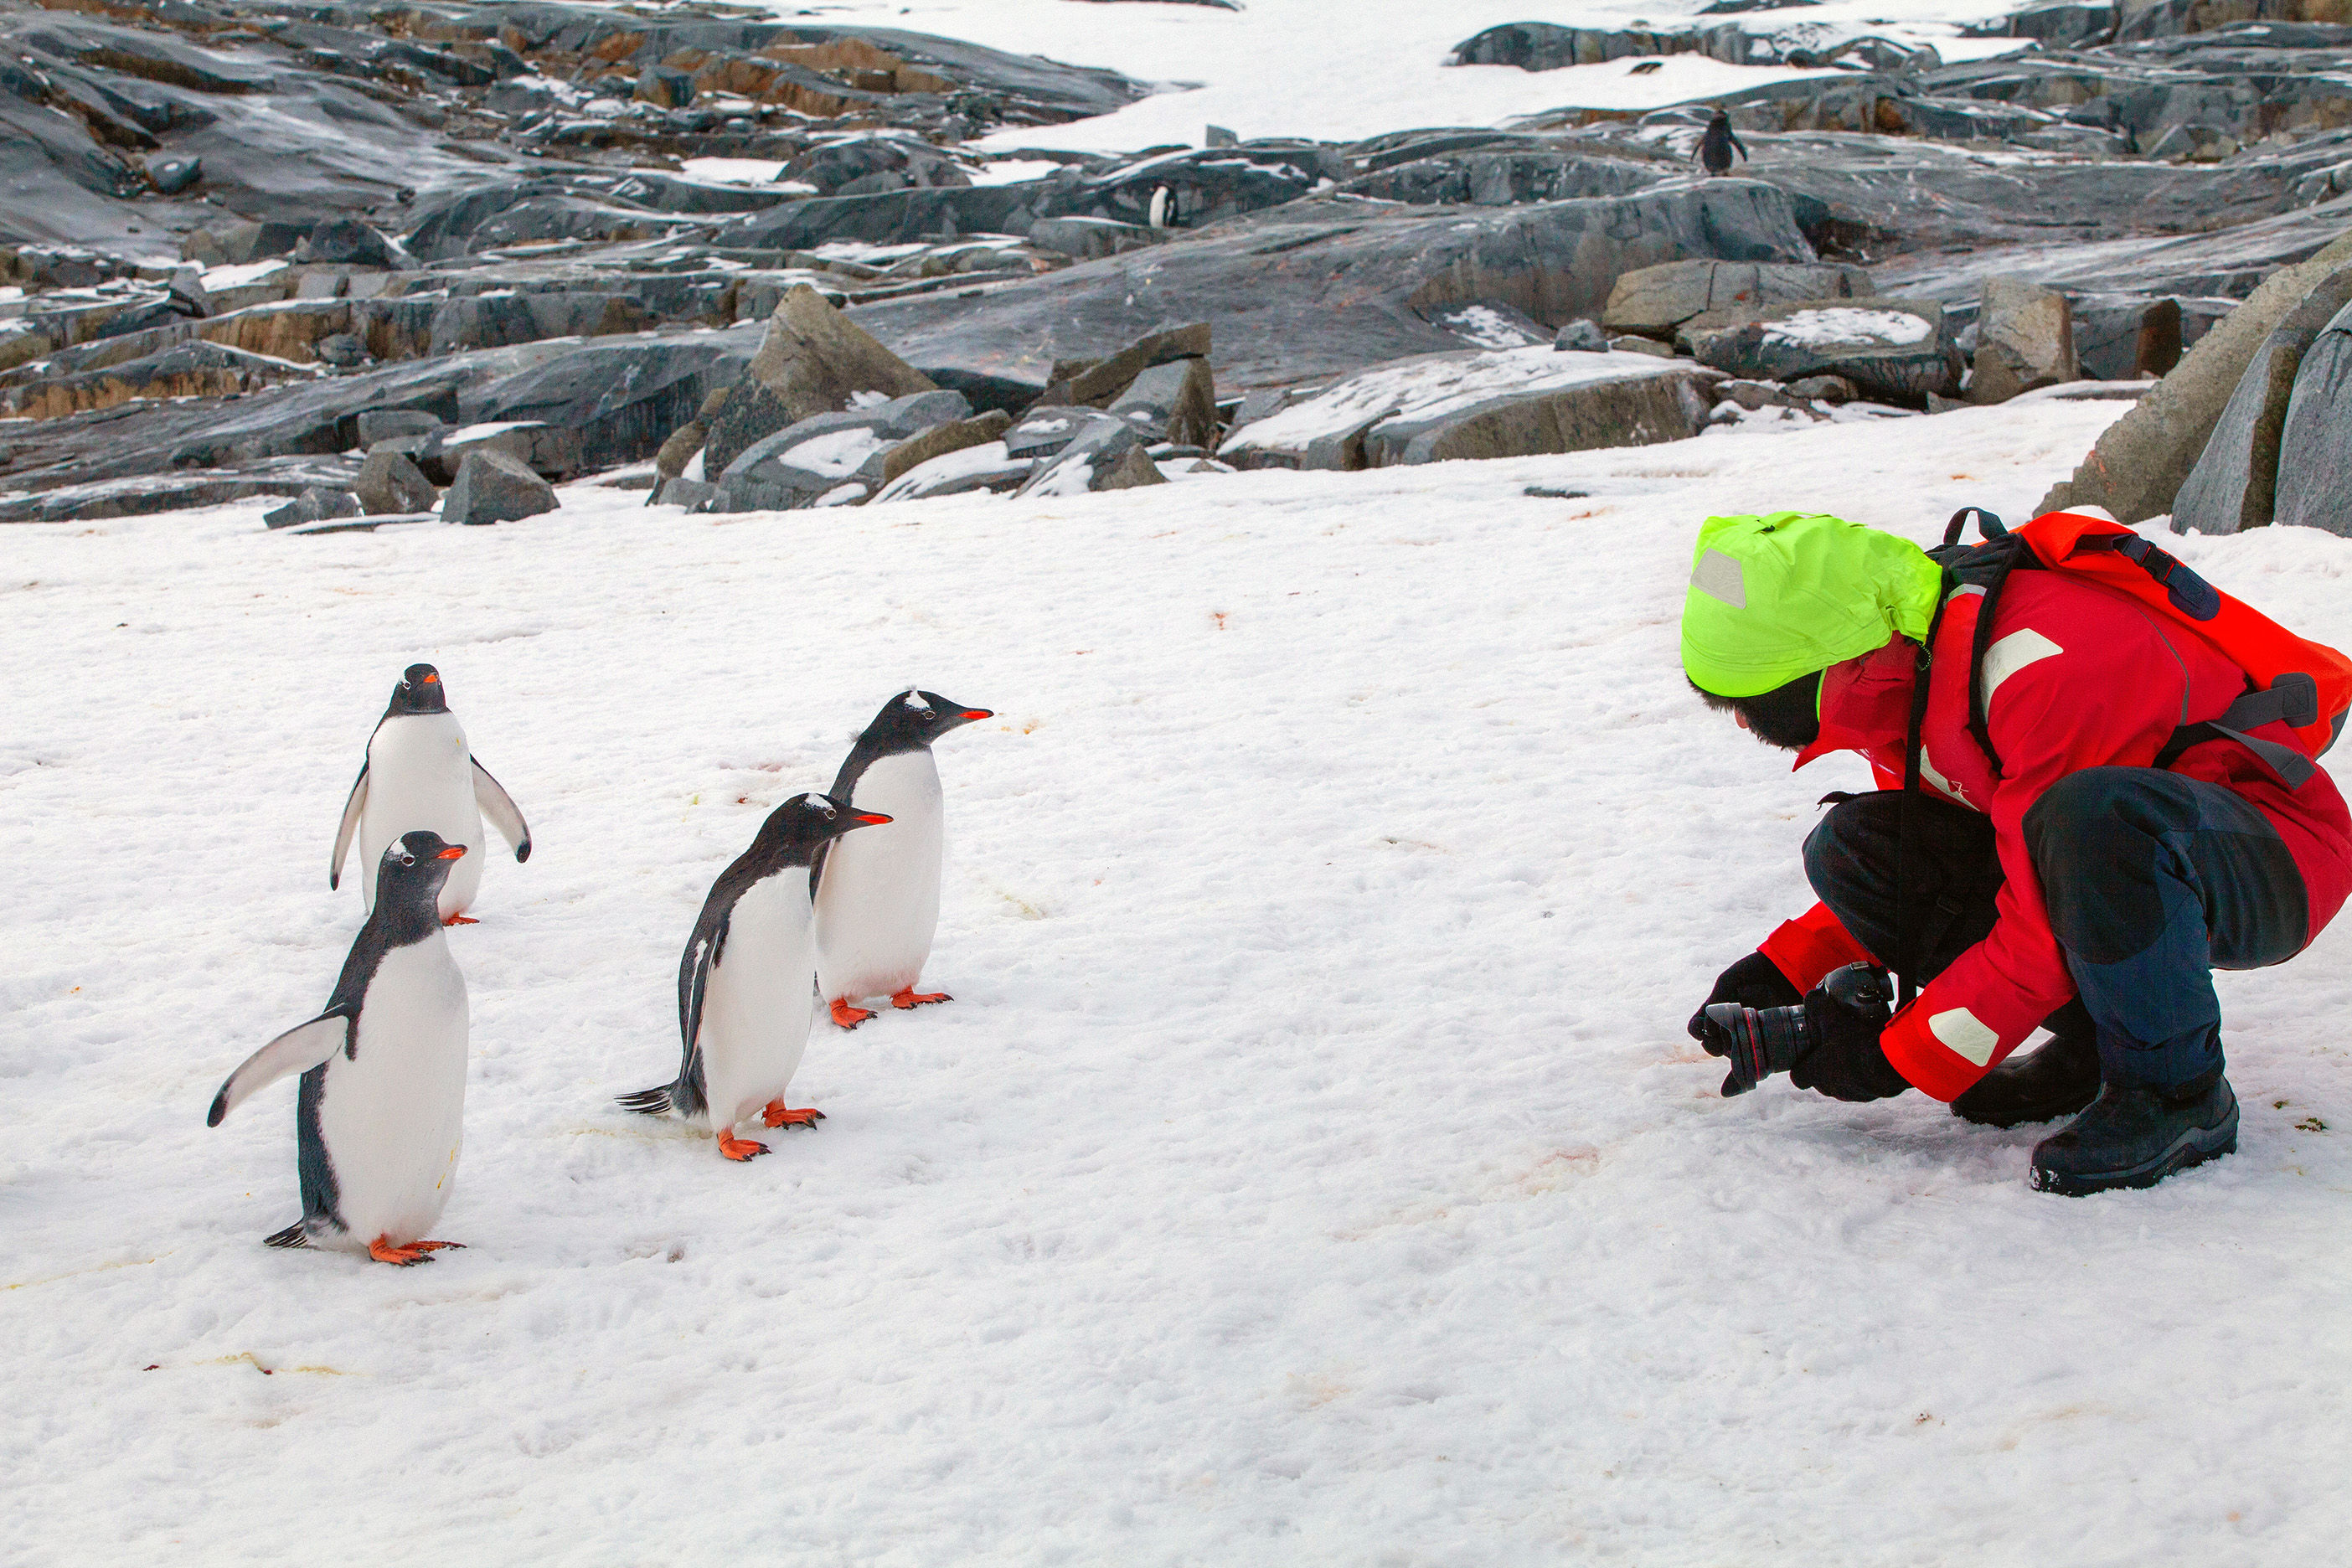
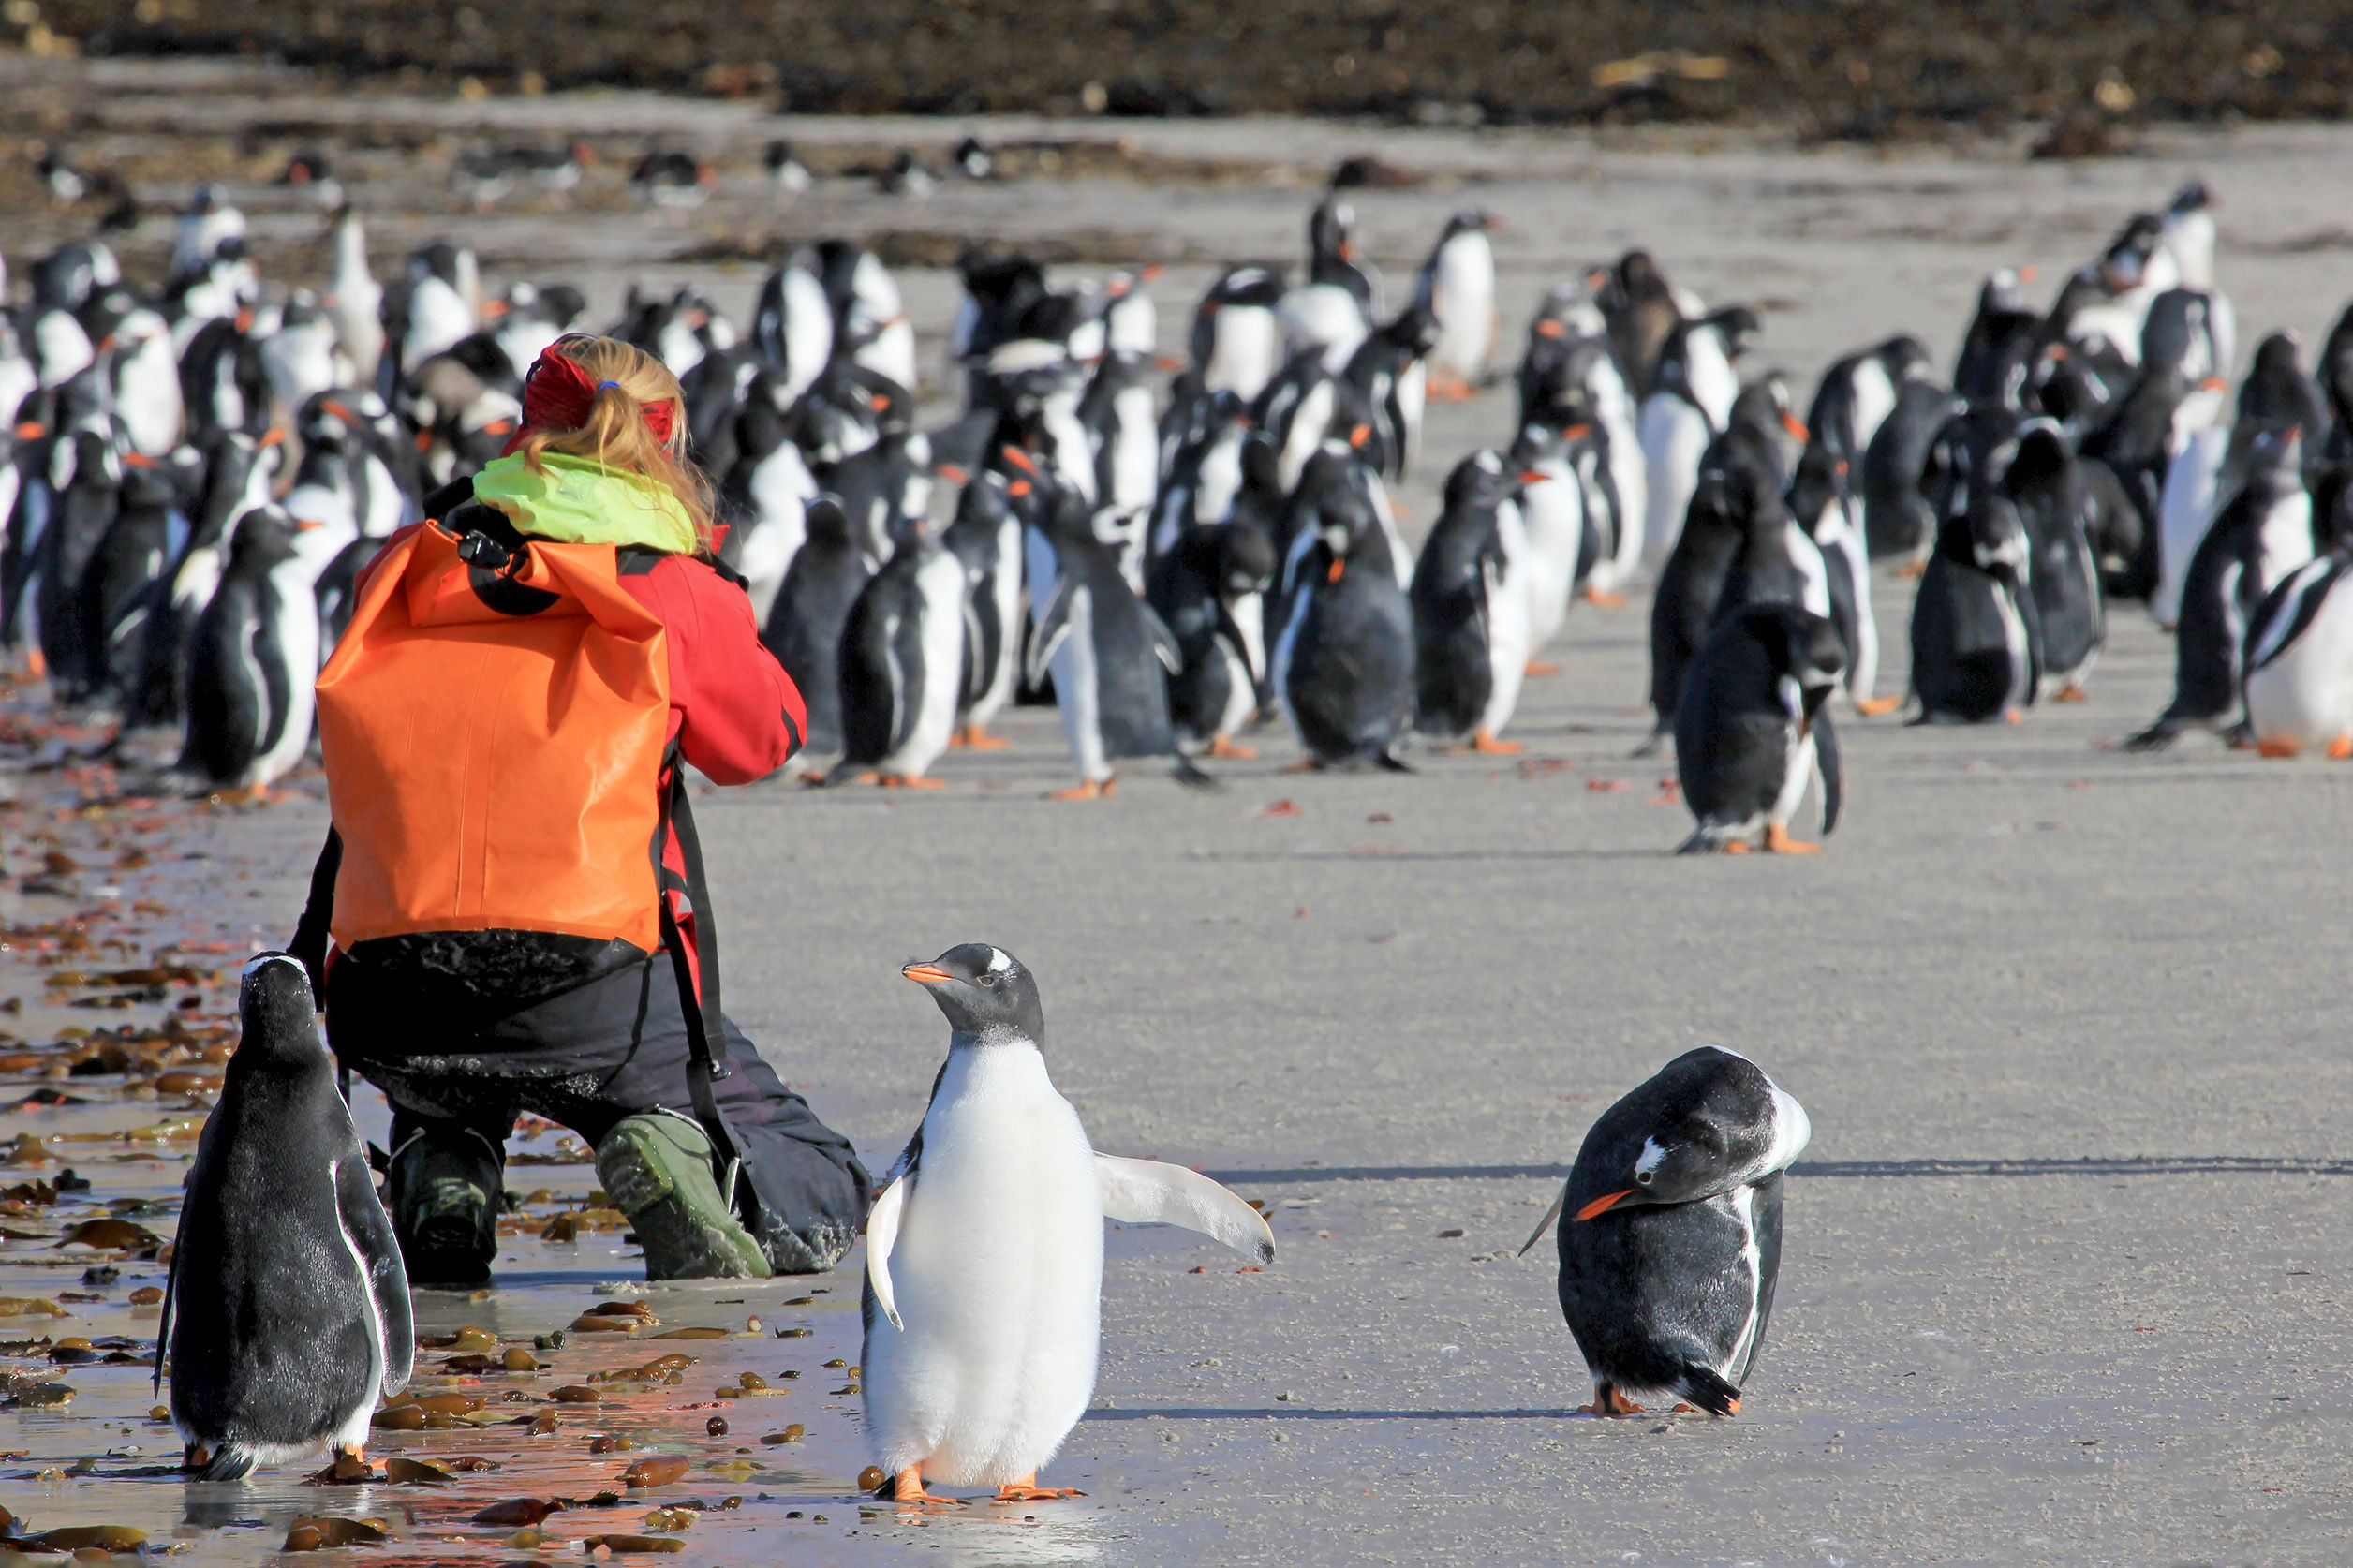
In Antarctica, proximity replaces distance, and behavior replaces anticipation. Penguins—gentoo, chinstrap, Adélie, and, on longer routes, king and emperor—move through predictable routines. IAATO guidelines set a five-meter minimum; in practice, birds approach on their own terms, threading through tripods and boots. With gentoo penguins, look for the pause before a dive, the exchange at the nest, and the line of birds returning from sea. Shutter speeds can drop for static scenes, but for porpoising entries and exits, 1/2000 sec keeps spray and wings crisp.
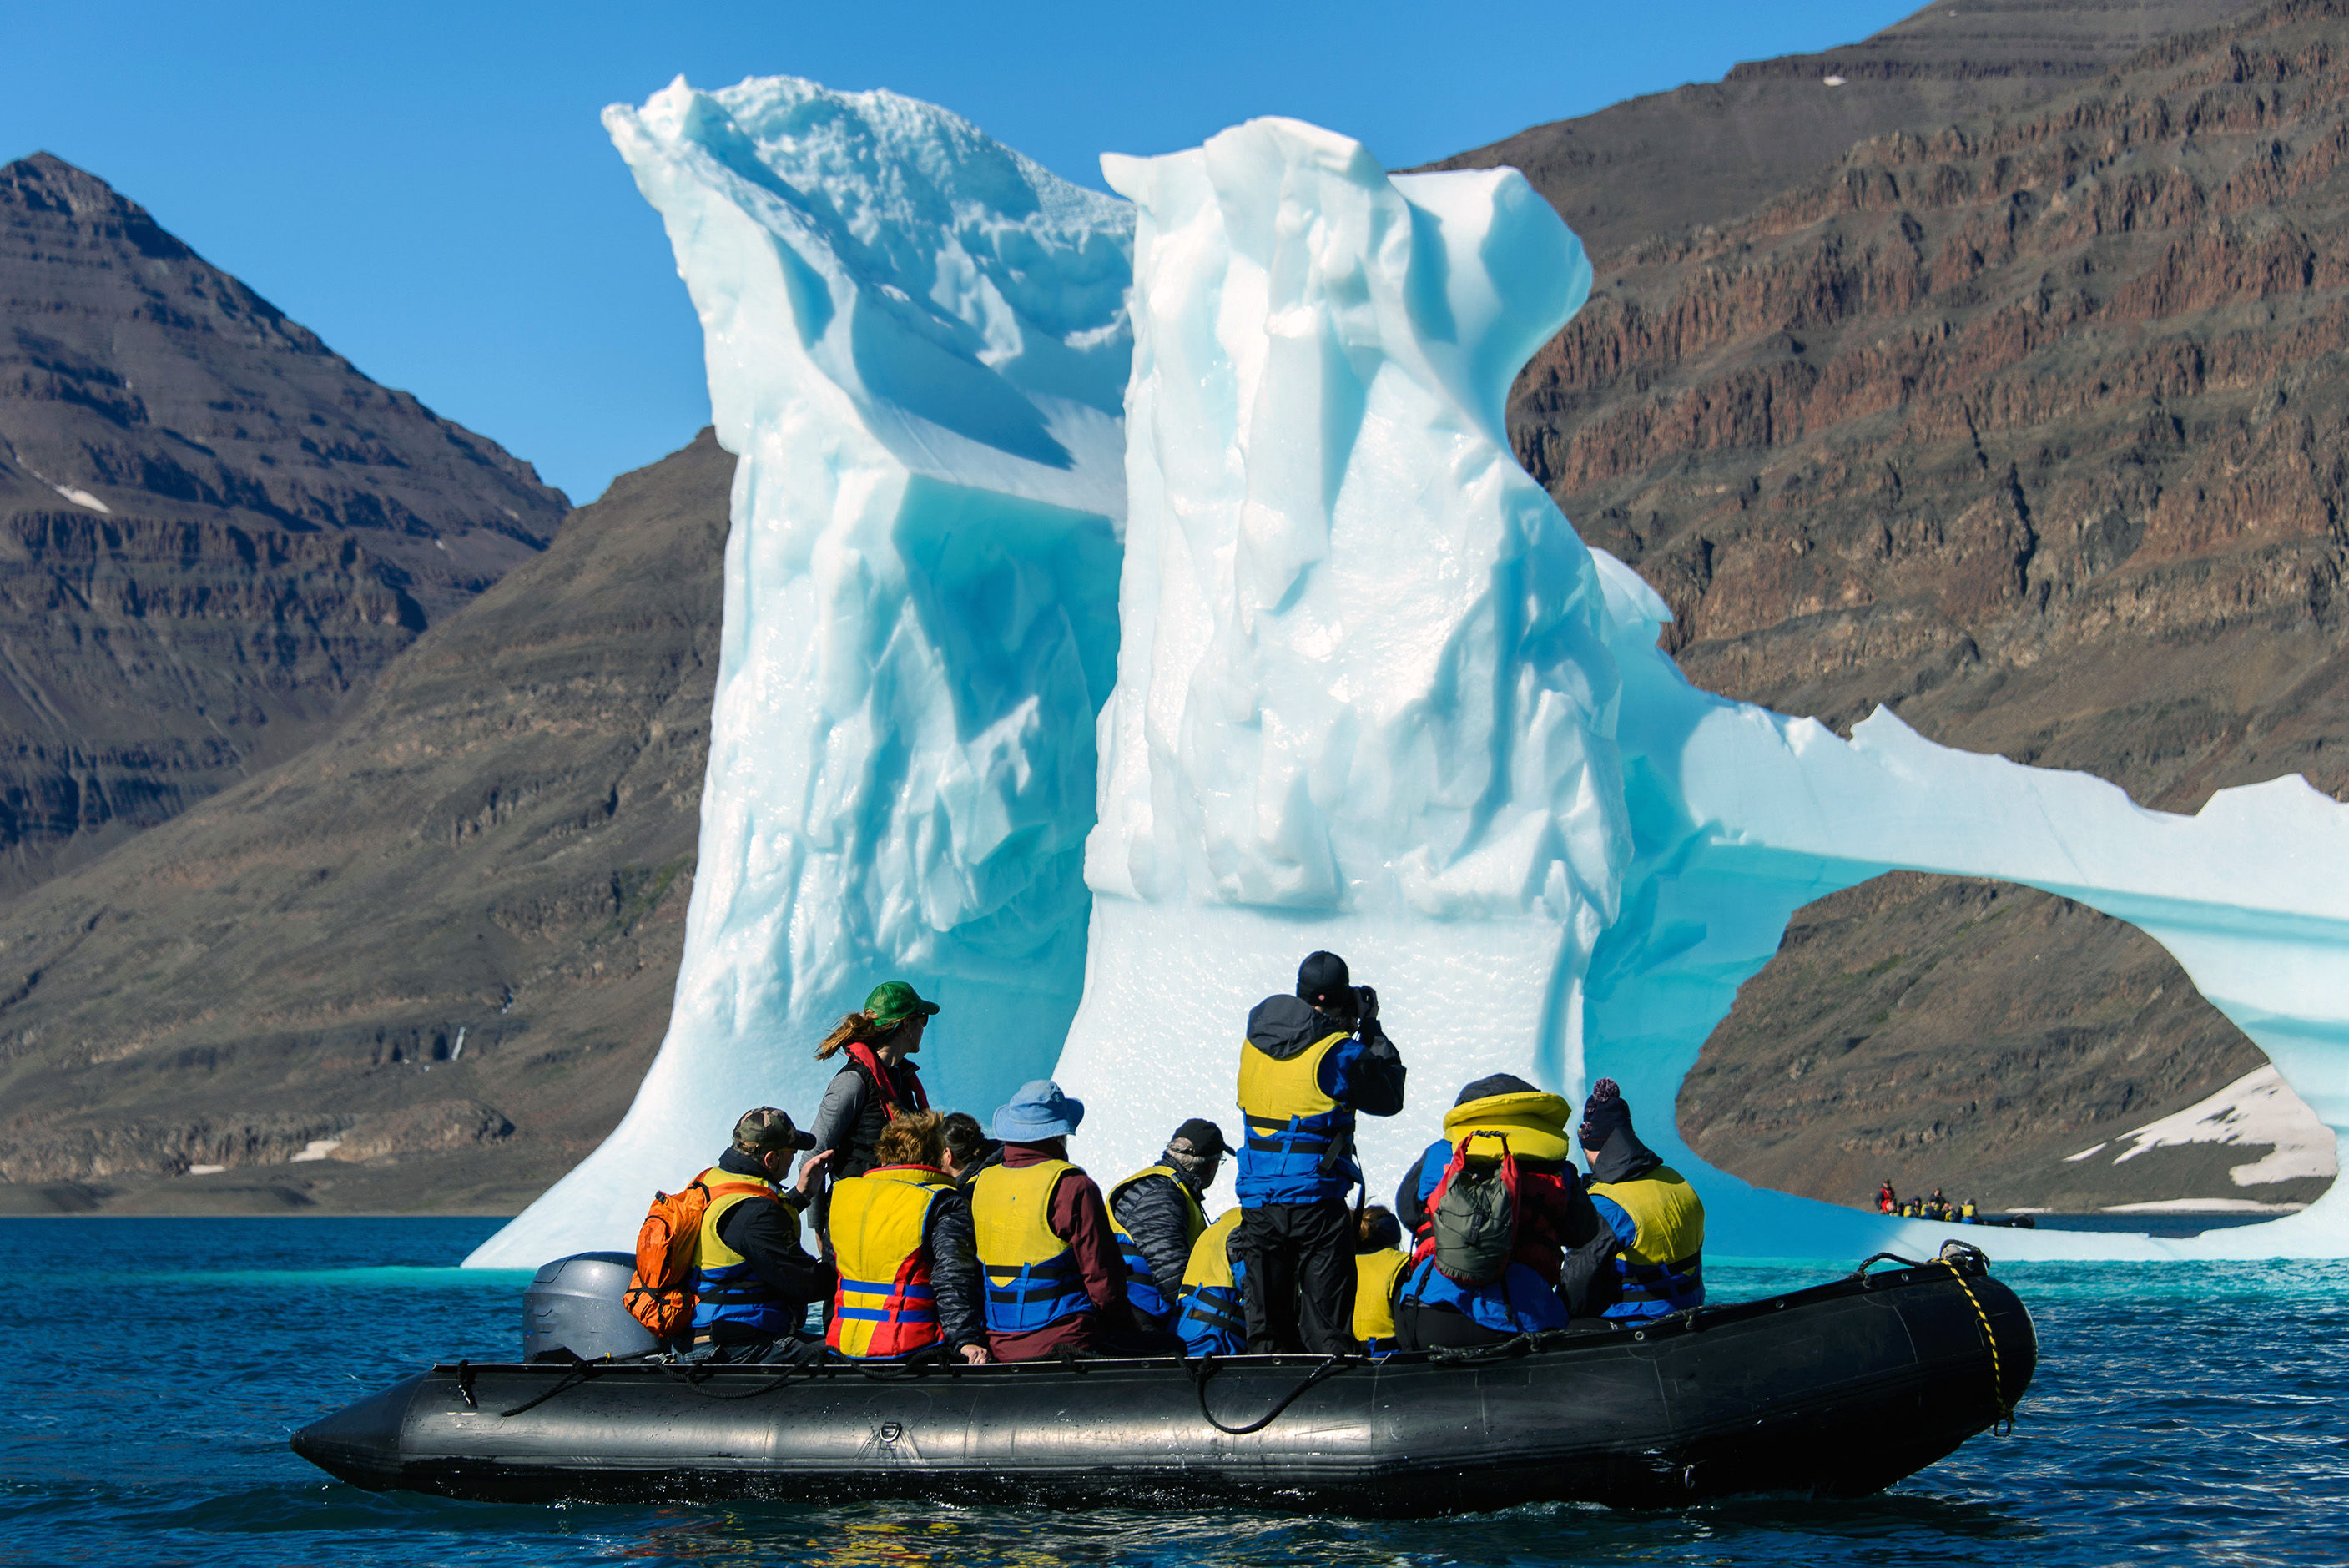
The geography is canonical. The Antarctic Peninsula concentrates wildlife and ice within reach of small ships. The Lemaire Channel narrows to less than a mile across, with peaks rising roughly 3,000 feet on either side; in still water, it becomes a study in symmetry and restraint. The Weddell Sea offers tabular bergs—vast, flat-topped slabs calved from ice shelves—while the South Shetland Islands provide accessible landings and varied colonies. Farther east, South Georgia shifts the scale again: beaches crowded with tens of thousands of king penguins, elephant seals in territorial conflict.
Iceberg photography presents a problem of scale. Without a reference, a twenty-meter arch reads like a small sculpture. Include a Zodiac, a line of penguins, or a distant peak to anchor the eye. Overcast days simplify the palette; use them to isolate form and texture. Clear days introduce deep blue shadows; expose carefully to hold detail in both.
Whales are the counterpoint. In the Gerlache Strait, humpbacks feed in loose groups; flukes rise and fall with a cadence that can be learned. Pre-focus on the slick where the whale has sounded, keep the frame loose, and anticipate the lift. Orcas move differently—purposeful, often in formation—requiring faster reactions and wider framing.
On an Antarctica photography tour or Antarctica photography cruise, the density of subjects can be disorienting. The discipline is to choose: one behavior, one line of light, one subject, and to ignore the rest. These are among the most useful Antarctica cruise photography tips, and they translate directly from the Arctic: the camera is the same, but the edit happens in real time.
Expert-Led Expeditions Matter for Photographers
On a general expedition, the ship follows an itinerary; on a photo-led expedition, it follows light and opportunity within the same safety envelope. The difference is subtle on paper and material in practice. Onboard photo guides pre-scout landings and brief the group not just on wildlife but on where the light will fall, where the background cleans up, and when to wait. Zodiacs run smaller groups more often, extending shore time and reducing crowding at obvious subjects.
Routing flexibility is the quiet advantage of small ships. A captain and expedition leader can adjust course to work a fog bank lifting over a glacier or to return to a colony as light changes. Even an hour’s shift can transform a scene. Image-review sessions close the loop: files are examined for exposure decisions, autofocus choices, and compositional trade-offs, turning a week’s shooting into a set of repeatable habits.
Those considering small-ship photography expeditions to both poles are not buying access so much as structure: a framework that aligns ship, guides, and time with the needs of a camera. The places remain the same; the outcomes tend not to.
Packing For It
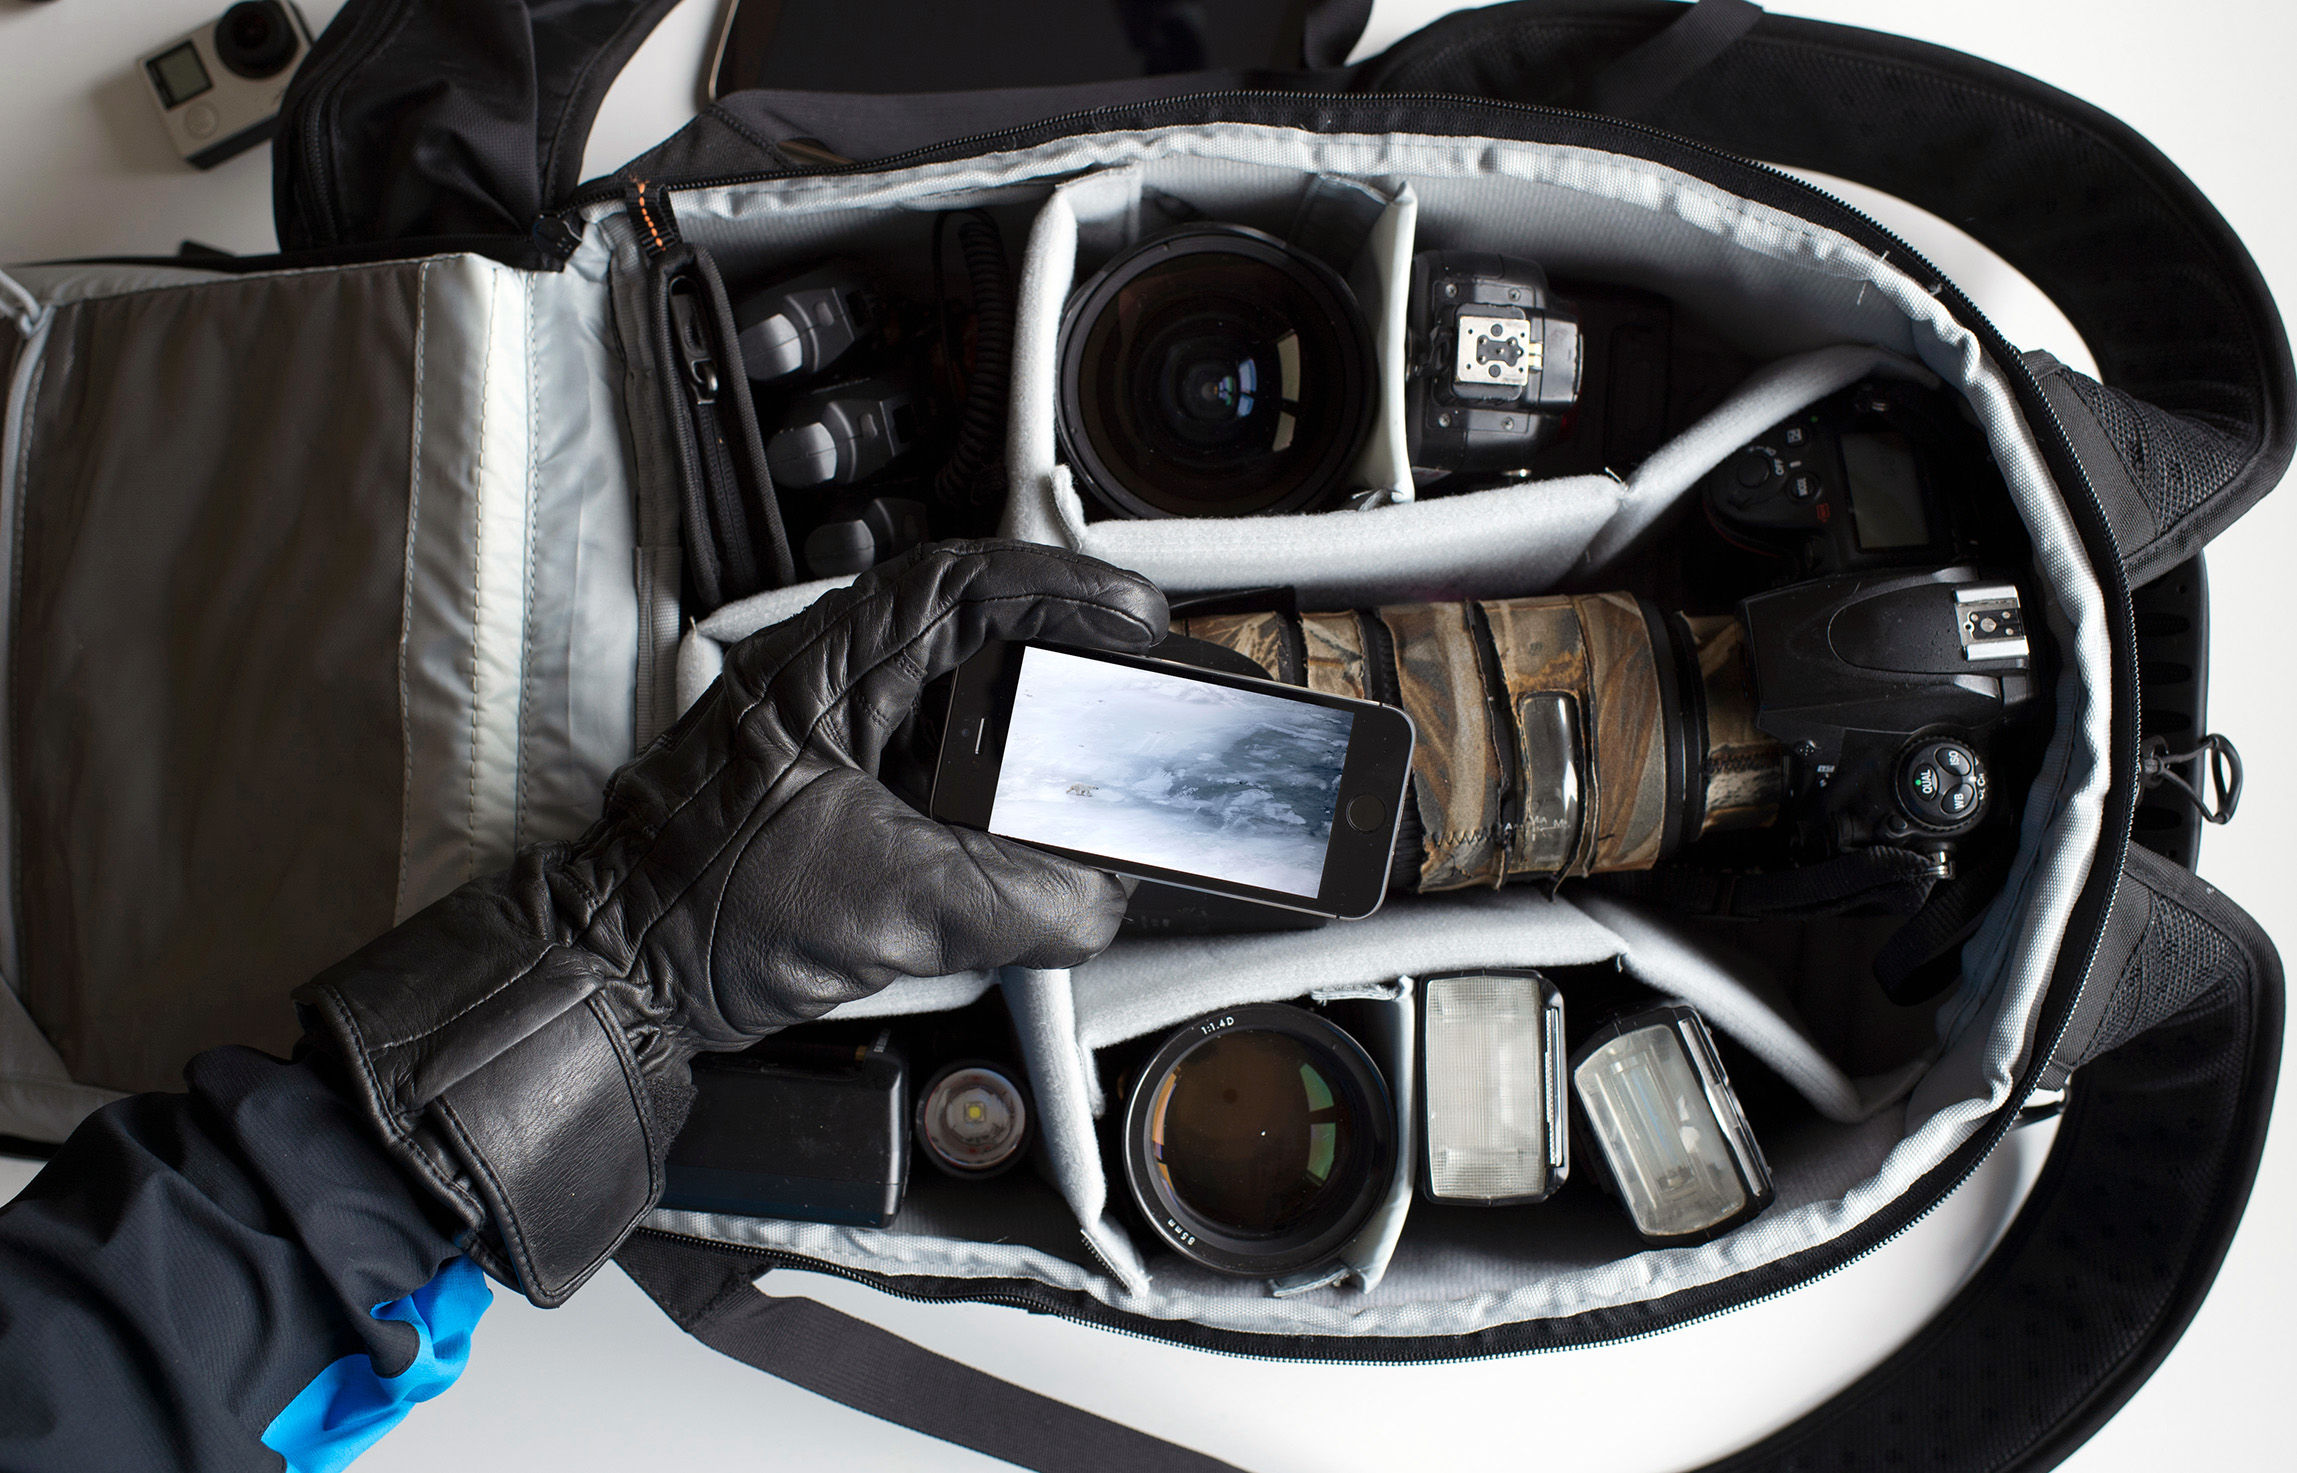
- Two bodies, weather-sealed if possible; one long zoom, one mid-range.
- Extra batteries and a simple rotation plan; keep them warm.
- Dry bags and microfiber cloths for spray; lens hoods stay on.
- Neutral footwear for landings; kneel without sinking or soaking.
- Basic maintenance kit: blower, brush, and a few silica gel packs.
- A clear shooting brief: one or two subjects per outing, not ten.
The poles reduce photography to first principles: light, distance, and time. Everything else is noise.